
5 Step by Step Propagation of Succulents
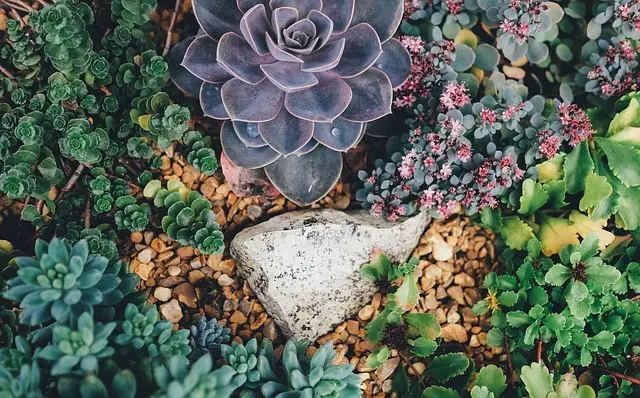
Succulents have recently become immensely popular in the plant world, and for good reason. They are quite simple to care for, and there are a variety of interesting and gorgeous arrangements that can be made with them. Succulents have even been used to create bridal bouquets that were entirely composed of the plants. They may be found anywhere, and they are very addictive to grow.
It’s true that you may visit your local store’s garden center and purchase more succulents, but did you know that you can propagate an abundance of new succulents from a single plant?
You can grow your very own succulents with a little care and patience, and I’m here to show you how simple it is to get started.
Succulents and How to Propagate Them (Step by Step)
What is the definition of propagation?
Propagation is the process of growing a new plant from a portion of an existing plant. In this instance, we are repurposing succulent components in order to develop new succulent plants.
Succulents are a kind of succulent.
What portions of a succulent will result in the growth of a new plant?
Almost every portion of a succulent has the potential to sprout into a new plant! The most frequent way of propagation is by leaf cuttings, which are available in plenty. You may also utilize the bare stem that remains after the leaves have been removed to start a new plant from each area where a leaf was previously present.
Lastly, you may cut off the top of a succulent and plant it as a new plant, and the succulent will root out of the stem from the bottom.
Stems that are lush and green
Now that you understand what we’re talking about, let’s get to work creating some kids!
The process of propagation begins with a leaf.
Using a leaf, also known as a leaf cutting, to propagate a plant, you have two options: either utilize a leaf that has fallen off on its own or gently twist or shake a leaf until it detaches from the stem. When the leaf is released, you will hear a light *snap* sound.
Make a bed of your leaves on a paper towel and let the ends of your leaves to dry until they develop a callus. At this stage, you may either wait until they begin to grow roots or new leaves from the end, or you can just set them on top of soil and water them. It is not necessary to plant them in the soil; they may just be placed on top of it.
Succulent Leaf Succulent Leaves are a kind of succulent.
Although I did not water them for a long period of time, the plants continued to grow, so even if this is your first time doing this, I am certain that you will be able to propagate some of your own succulents.
Leaves with a lot of flavor
It’s important to note that some of the leaves will provide better results than others, so it’s a good idea to test a few different ones.
Leaves with a lot of flavor
Give your leaves plenty of light and water them as often as they need while they are still growing. You should give young succulents more water than you would mature succulents, but be careful not to over-water them. A tiny quantity of water applied once a week seemed to be sufficient.
Alternatively, you may sprinkle the tiny plants with a spray bottle instead of watering them, but this will need you to do so on a nearly daily basis.
Succulent rosette propagation is accomplished by dividing the rosette.
Occasionally, if your succulents do not get enough sunshine, plants will become tall and leggy in appearance. In this situation, you may choose to re-grow it and start again from the beginning.
Pull the leaves away from the stem, leaving just the rosette at the top of the stem, to do this. Set those leaves aside for propagation as well, and then use sharp, clean scissors to cut the stem about an inch below the rosette to allow for further propagation.
During the winter, I relocated my succulent away from my (drafty) window and placed it under artificial light for the first time. It seems to have disliked the artificial light and has become quite leggy as a result of this.
In a wall planter, succulents grow.
But that’s alright since it’s now an excellent candidate for propagation, so everything is well. Using this method, I was able to remove all of the lower leaves (and there were a lot of them!) I’m left with a tall stem and a rosette as a result.
Succulents that do not have lower leaves
With my pruning shears, I removed the rosette off the plant.
Rosette in full bloom
From here, just let the stem callous to harden for a short period of time before planting in soil. You now have a fresh new succulent in your possession!
Succulent stems are propagated through division.
After you’ve removed the leaves and cut the rosette from the stem, you’ll be left with a bare stem to work with. Don’t throw it away; you can really develop new plants directly from the stem of an existing plant!
Simply leave it alone and let it to callus over, and new plants will begin to emerge from each location where a leaf has been plucked over time.
Stems that are lush and green
Here’s my stem, all calloused up and with a slew of young plants sprouting from it!
Succulent Stem with Calloused Skin
Callousing is quite important.
You may be asking why each of the steps listed above requires you to let the ends to callous over. The rationale for this is to keep the food from spoiling.
Waiting for the callous to form on the ends will result in them absorbing too much moisture and eventually decaying from the inside out. That is something we do not desire. When propagating succulents, it is critical to remember to wait for them to dry and callous before transplanting them.
Always use well-draining soil while growing succulents to ensure that the roots do not get clogged with excess water. Cactus soil is a fantastic option, but any well-draining potting soil will suffice as long as your planter’s bottom is equipped with appropriate drainage holes.
All of a sudden, you’re an adult.
The original leaves of your succulent parts will fade away now that the succulent parts have sprouted new baby plants. You may gently twist or rock the new baby back and forth to remove the wilting mother leaves and replant the baby in a different area when it has recovered from its shock.
Succulents in miniature form
Succulents in miniature form
And what are we supposed to do with all of these new plants?
You will have a large number of baby succulents now that you have propagated all of the sections of your succulent. Here are some suggestions for things to do with your new children.
Make arrangements in a pot or a barrel to display.
Get yourself these adorable tiny planter sets to raise your kids in.
With your succulents, create a fairy garden or a hanging terrarium to display.
As presents, give them to your friends and neighbors.
Organize a gardening club and see what kinds of things everyone can come up with.
Planters for Succulents in Small Containers
Succulent propagation is quite gratifying and enjoyable, as you can see. It just takes one little plant to produce a large number of young plants, which you may enjoy for years and years. Now that you’ve learned how to do it, go ahead and enjoy yourself by cultivating your own succulents.
Alternatively, if you’re seeking for additional information on propagating succulents, there are several excellent videos available on YouTube that will lead you through the procedure. This specific video is a fantastic place to begin your research. Wishing you the best of luck!
Can Apple Tree Roots Invade and Damage Property? 5 Indoor Plants Poisonous to Cats and Dogs 5 Amazing Night-time Oxygenating Indoor Plants Ways to Prevent Your Dog Eating Your Plants Can Apple Tree Roots Invade and Damage Property? Baby Spider Plants Die How to Save Them Why Aren’t My Calla Lilies Blooming? TRAVEL PLAN FOR THE SOUTH LUANGWA NATIONAL PARK