HOW TO CONTROL BBQ FLARE-UPS
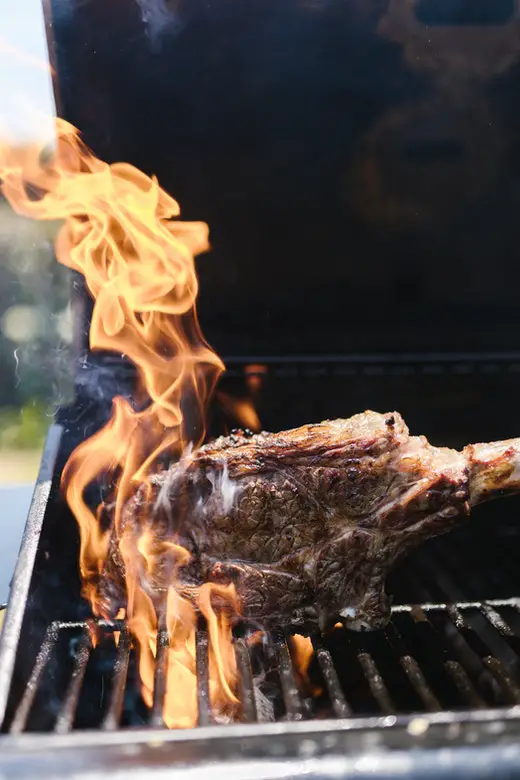
Flickering oil or fat that gets into your gas grill and starts to burn is known as a flare-up. Grilling flare-ups are unavoidable, but they may rapidly spiral out of control, charring an otherwise perfectly excellent piece of meat.
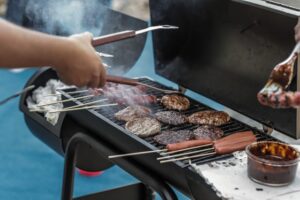
Remove the grease/fat coated food from the flare-up area and place it in another section of the grill. This will help to keep the flare-up under control. As an example, if you have a number of hamburgers on the grill and there is a flare-up, just move the burgers away from the flare-up or off the grill and wait for the grease to burn off the grill. Stacking the burgers in the one part of the restaurant that is not engulfed in flames, I’m simply waiting for the flare-up to go down of its own own, I suppose.
After the flare-up has subsided, slowly reposition the food in the area where it was originally located.
Prevention of flare-ups may be accomplished in many ways:
1. Make use of lean cuts of meat wherever possible.
Secondly, remove any extra fat from your meat
.
3. Don’t use excessive quantities of oil (vegetable oil, marinade, etc.) and then toss the food on the grill while it’s still dripping on the grill.
Lastly, keeping a spray bottle filled with water near the grill may save you from having to contact the fire department, which might spoil an otherwise beautiful barbecue.
READ MORE —-GETTING YOUR BARBEQUE GRILL READY FOR THE SUMMERWhat Is a Grill and How Does It Work? Flare-up?
It is not the same as a grease fire to have a flare-up. Flare-ups are brief bursts of flame caused by fat dripping onto hot coals. They’re a typical part of grilling and aren’t something you have to “throw out.” It is better to just move the food to a new spot on the grill to deal with them.
Typically, a flare-up occurs on a charcoal barbecue because the hot coals beneath ignite the dripping fat. Many gas grills are equipped with drop guards, which are meant to redirect liquid fat away from the heating source. However, as a result of this, grease may accumulate over time, and the buildup might result in a full-blown grease fire.
Preventing (and preparing for) Grilling Fires
Flare-ups may be avoided by reducing the quantity of fat and oil on the meal that is grilled. During the cooking process, chicken, steaks, and burgers will all leak fat onto the embers. This isn’t always a negative thing, since it is their increased fat content that makes certain items suitable for grilling in the first place.
Excess fat and oil, on the other hand, are a different story. When grilling steaks, the key is to take away all but 1/4 inch of fat from the margins before cooking them. Especially if the marinade has a lot of oil, be sure the meat isn’t leaking when you place it on the grill. Another approach to minimize flare-ups is to reduce the amount of oil you brush over your meal before grilling.
Brief flare-ups are common, and you normally don’t have to do anything about them. However, if one lasts for more than a couple of seconds, your first step should be to shift the object to a different place of the grill. But where is it? An example of this is a two-zone fire.
The Two-Zone Method is a technique for dividing a space into two zones.
Simply putting coals on one side of the grill and leaving the other empty creates a hot zone and a cold zone on the grill. A flare-up may be easily resolved by relocating any drippy food to a cooler area of the grill and waiting for the flames to decrease.
Don’t pile the coals too high, however, since the closer the coals are to the food, the more probable it is that a flare-up will occur.
If you have a gas grill, you may create a two-zone fire by simply turning off one area of the burners.
Because they leak a lot of fat, chicken, particularly thighs and complete legs, are particularly prone to flare-ups. When grilling chicken, a two-zone fire is excellent since excessive heat might cause the chicken to burn on the exterior before it is completely cooked.
Use an upper warming rack if your grill is equipped with one, and set the food on it until the flare-up subsides. If you haven’t established a two-zone fire yet—or if your grill is already full—you may always transfer the food to a plate.
Remember that you should never attempt to contain a flare-up (or a grease fire, for that matter!) by spraying or dousing it with water. Spraying the coals will simply serve to fuel the flames and blast ash into your meal.
If, on the other hand, the flames continue to burn long after you’ve moved the food, or if they spread to the interior of the grill or to the food, your flare-up has progressed to the level of a grease fire, and it’s time to take the following steps.
Putting Out a Grease Fire
If the situation has progressed to the point of a true grease fire, it is unlikely that you will be able to save the food, but you may be able to extinguish a little blaze by depriving it of oxygen. Covering the grill and shutting all of the air vents will do this.
It is imperative that you do not add more water to a grease fire. It is necessary to extinguish a grease fire by depriving it of oxygen. Water will just serve to spread the flames farther.
Instead, sprinkle baking soda or a package of salt on top of it to soak it up. As a general rule, it is wise to have a fire extinguisher close by when grilling, but if the fire spreads or becomes too hot for you to approach, or if the flames reach the gas line or tank, dial 911 immediately.
Recovery after a disaster
Once the flames have been extinguished, it’s time to thoroughly clean the grill, both to remove any baking soda or fire extinguisher residue that may have remained on the inside of the grill, as well as any cooked grease that may have remained on the inside of the grill, including the lid and grates.
If your grill includes a grease collector or drip tray, you should also thoroughly clean it as part of your cleaning process. Cleaning up the grease can dramatically reduce your chances of having another grease fire.
WHY IS NOW THE BEST TIME TO GET AN OUTDOOR KITCHEN?